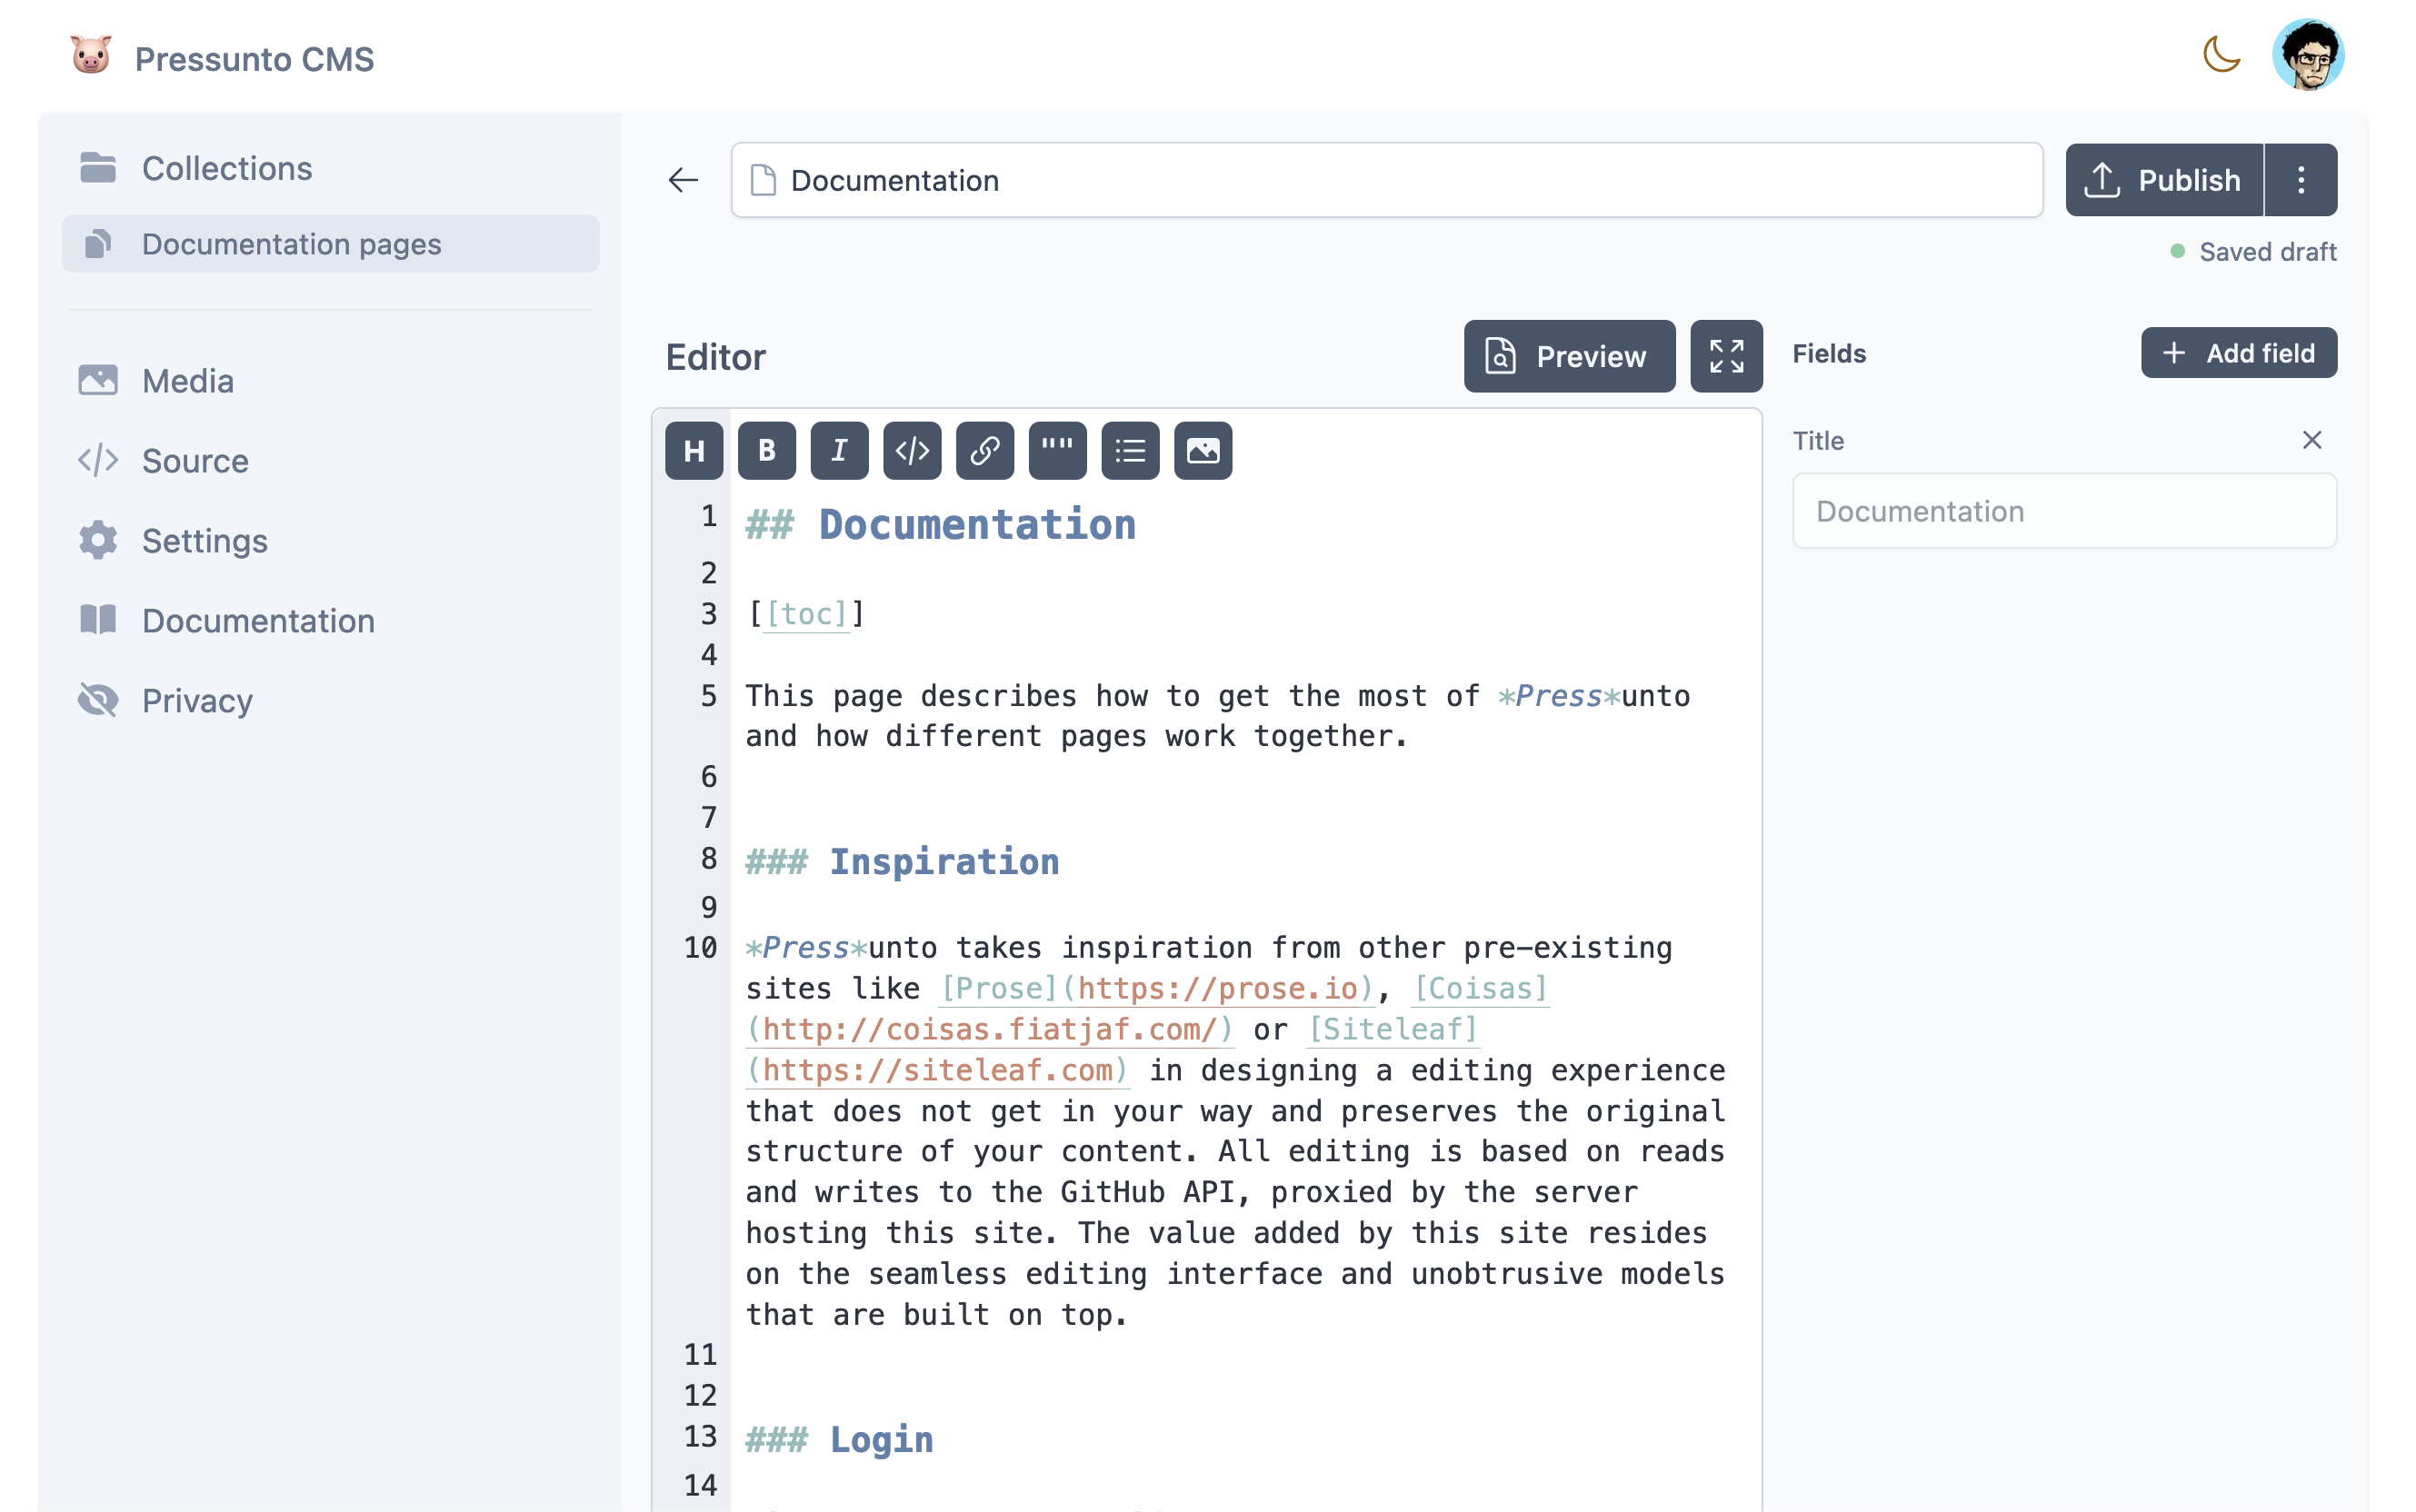
Documentation
This page describes how to get the most of Pressunto and how different pages work together.
Inspiration
Pressunto takes inspiration from other pre-existing sites like Prose, Coisas or Siteleaf in designing a editing experience that does not get in your way and preserves the original structure of your content. All editing is based on reads and writes to the GitHub API, proxied by the server hosting this site. The value added by this site resides on the seamless editing interface and unobtrusive models that are built on top.
Login

This is the screen you will see when you are not logged in with github. It also acts a landing page with a brief description of the platform values.
The yellow icon in the top part of the page is a button that can be used for changing the color theme from light to dark and viceversa.
In the selector below the introduction you can choose which type of github repos you want to list and edit, public repos only or public and private repos. This will only apply to repos where you have permission to push commits.
In the bottom part of the page, a transparency note acts as a cookie warning and as a resume for our privacy policy, explaining how your login data will be processed.
Projects
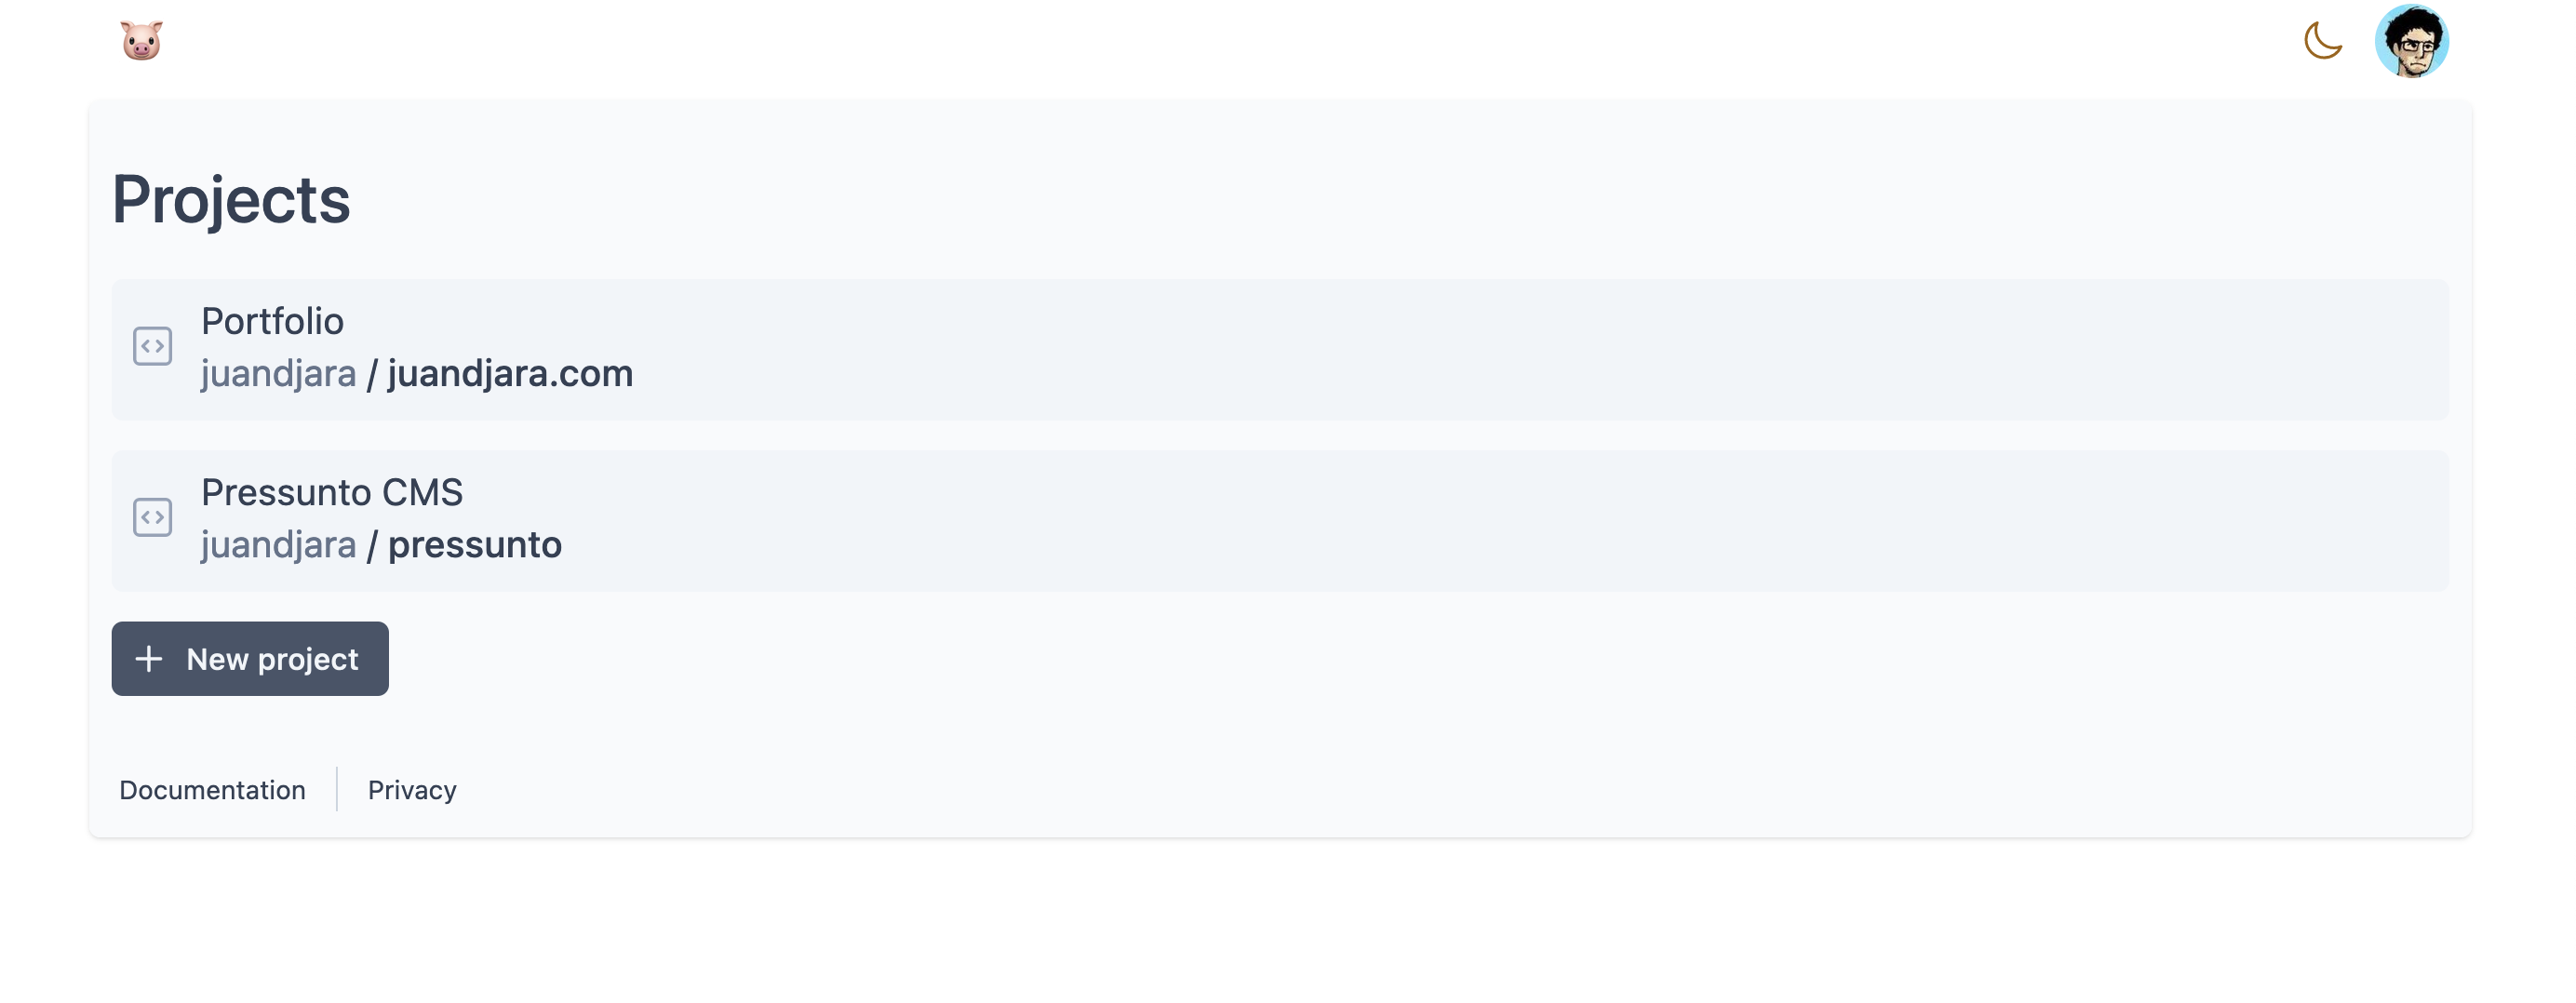
This page lists the github repos you have connected to Pressunto, each with their assigned title. From this page you can connect more repos to the platform and access the ones you have already connected
Edit link
Pressunto has a special feature which lets you directly access the editor for a file just writing the repo and the file you want to the edit in the URL, without having to worry about the internal routing structure of the platform.
An example for directly accesing the editor for this very file would be
https://pressunto.fly.dev/edit
  ?repo=juandjara/pressunto
  &file=content/docs/index.md
This URL will point to the right page for editing your file with Pressunto. This URL will redirect to the new project page if you haven't already connected this repo with the platform. If the file you want to edit is inside a collection, it will redirect you to that collection, and if not, it will redirect you the source code view where you can edit the file raw.
New Project
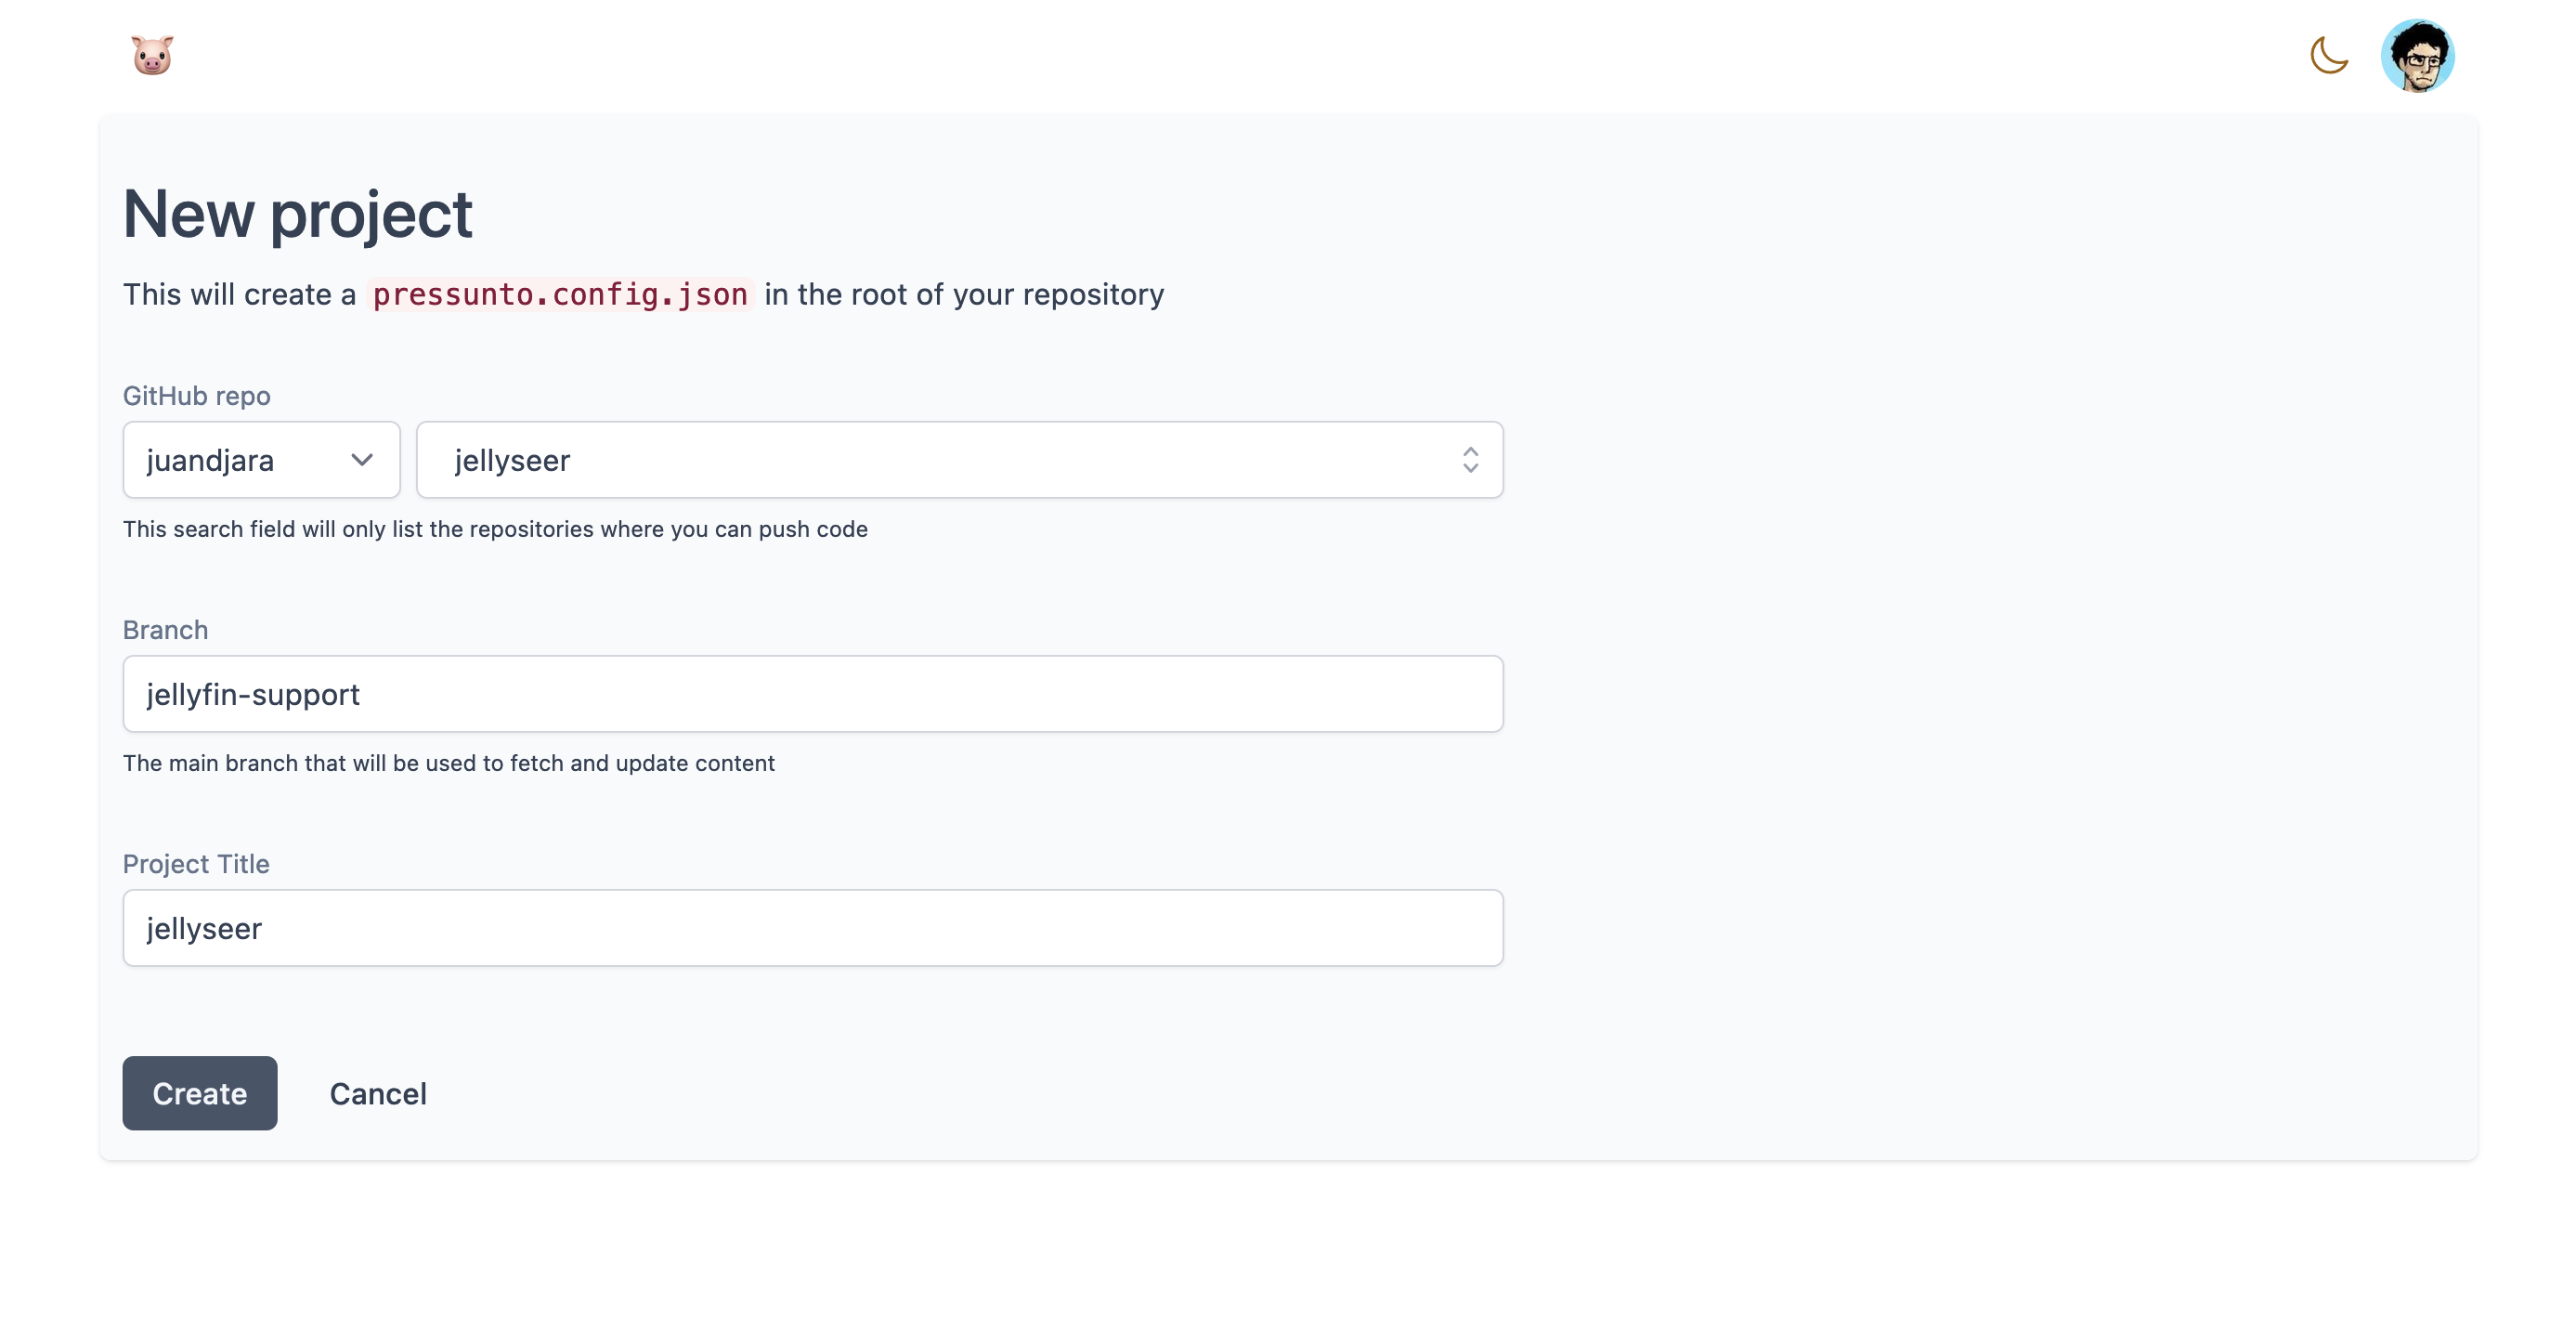
In this page you can create a new connection from a repo of yours to the platform. The repository selector will only list the repos where you have push permission. The branch field will make sure you select a correct branch for your repo and the title will appear at the top left of your screen in the project detail page.
When this connection is created, a project will be stored in the platform DB contaning this info. When the project is created, a template config file will be uploaded to the root of your repository with the name pressunto.config.json if it did not exists previosuly. Then, you will be redirected to the project details page.
Project Detail
This is the main layout of the application, the page that contains the whole editing experience. The left sidebar contains links to every page of importance here.
The top most section is for your collections, the folders where you can organize your content (more on this later).
- The first link takes you the list of your collections, which is the first page you will see when loading a project.
- Below this link is one for every collection you have configured, to have them always accesible.
- The Media page lists every binary file in your repository, in a grid view designed for images. It allows you to upload new images to your repo too.
- The source page shows every file in your repo in a tree view designed for exploring your folders. Here you can edit every file that is text based with a basic editor. It is designed for making small tweaks to your layout files.
- The Settings page is where all you configuration is handled. Your templates, collections, media folder and other project details are edited here.
- The Documentation page links to this very document you are reading
- The Privacy page links to a small document about how data is stored in the platform and what can you do to delete it if you want.
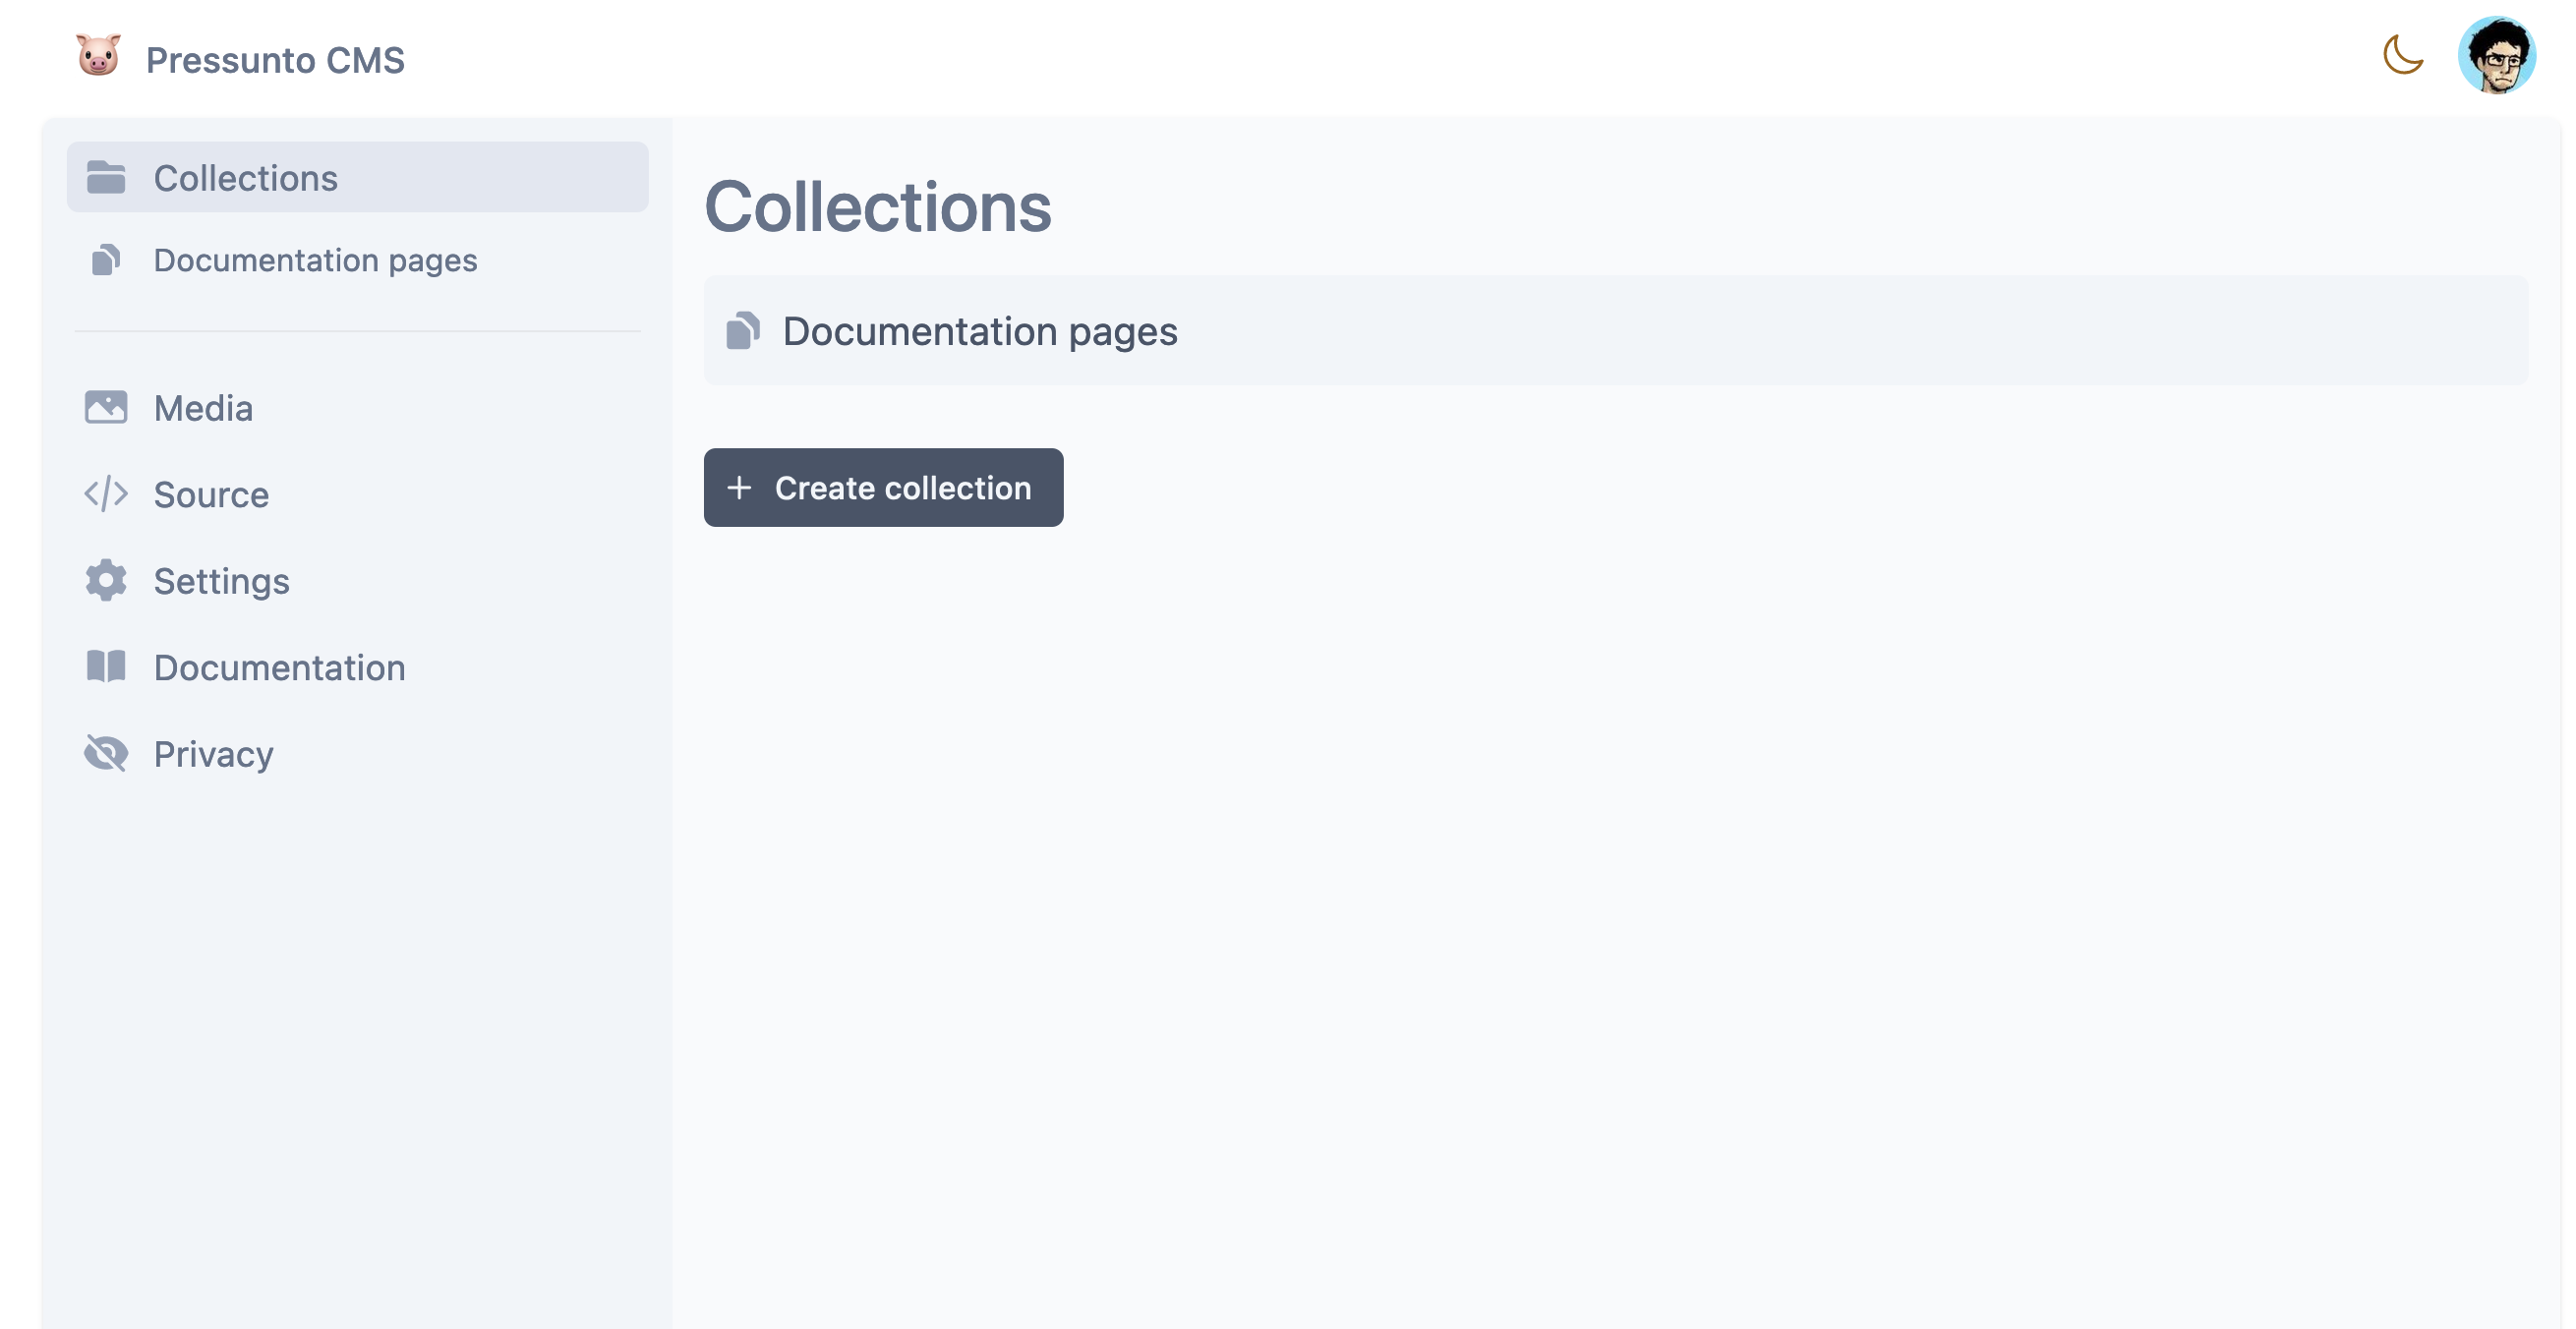
Collections
This page lists your collections, the folders where you can organize your content.
Collections map to actual folders in your repository. You can organize your markdown files with this. From the collection list page you can access the collection detail page or the collection settings for every collection. The collection detail page will list the markdown files in the collection folder, but not in subfolders.
Every collection is saved in your configuration file with this data structure:
{
  "id": "blog",
  "name": "Blog",
  "route": "/content/blog",
  "template": "blog",
}
- The id field is created automatically as a slug created from the
namefield. - The name field is the label that is displayed in the collections list.
- The route field is what defines the actual folder in your repository this collection uses.
- The optional template field contains the id of the template associated with this collection, if any (more on templates later)
Collection Detail
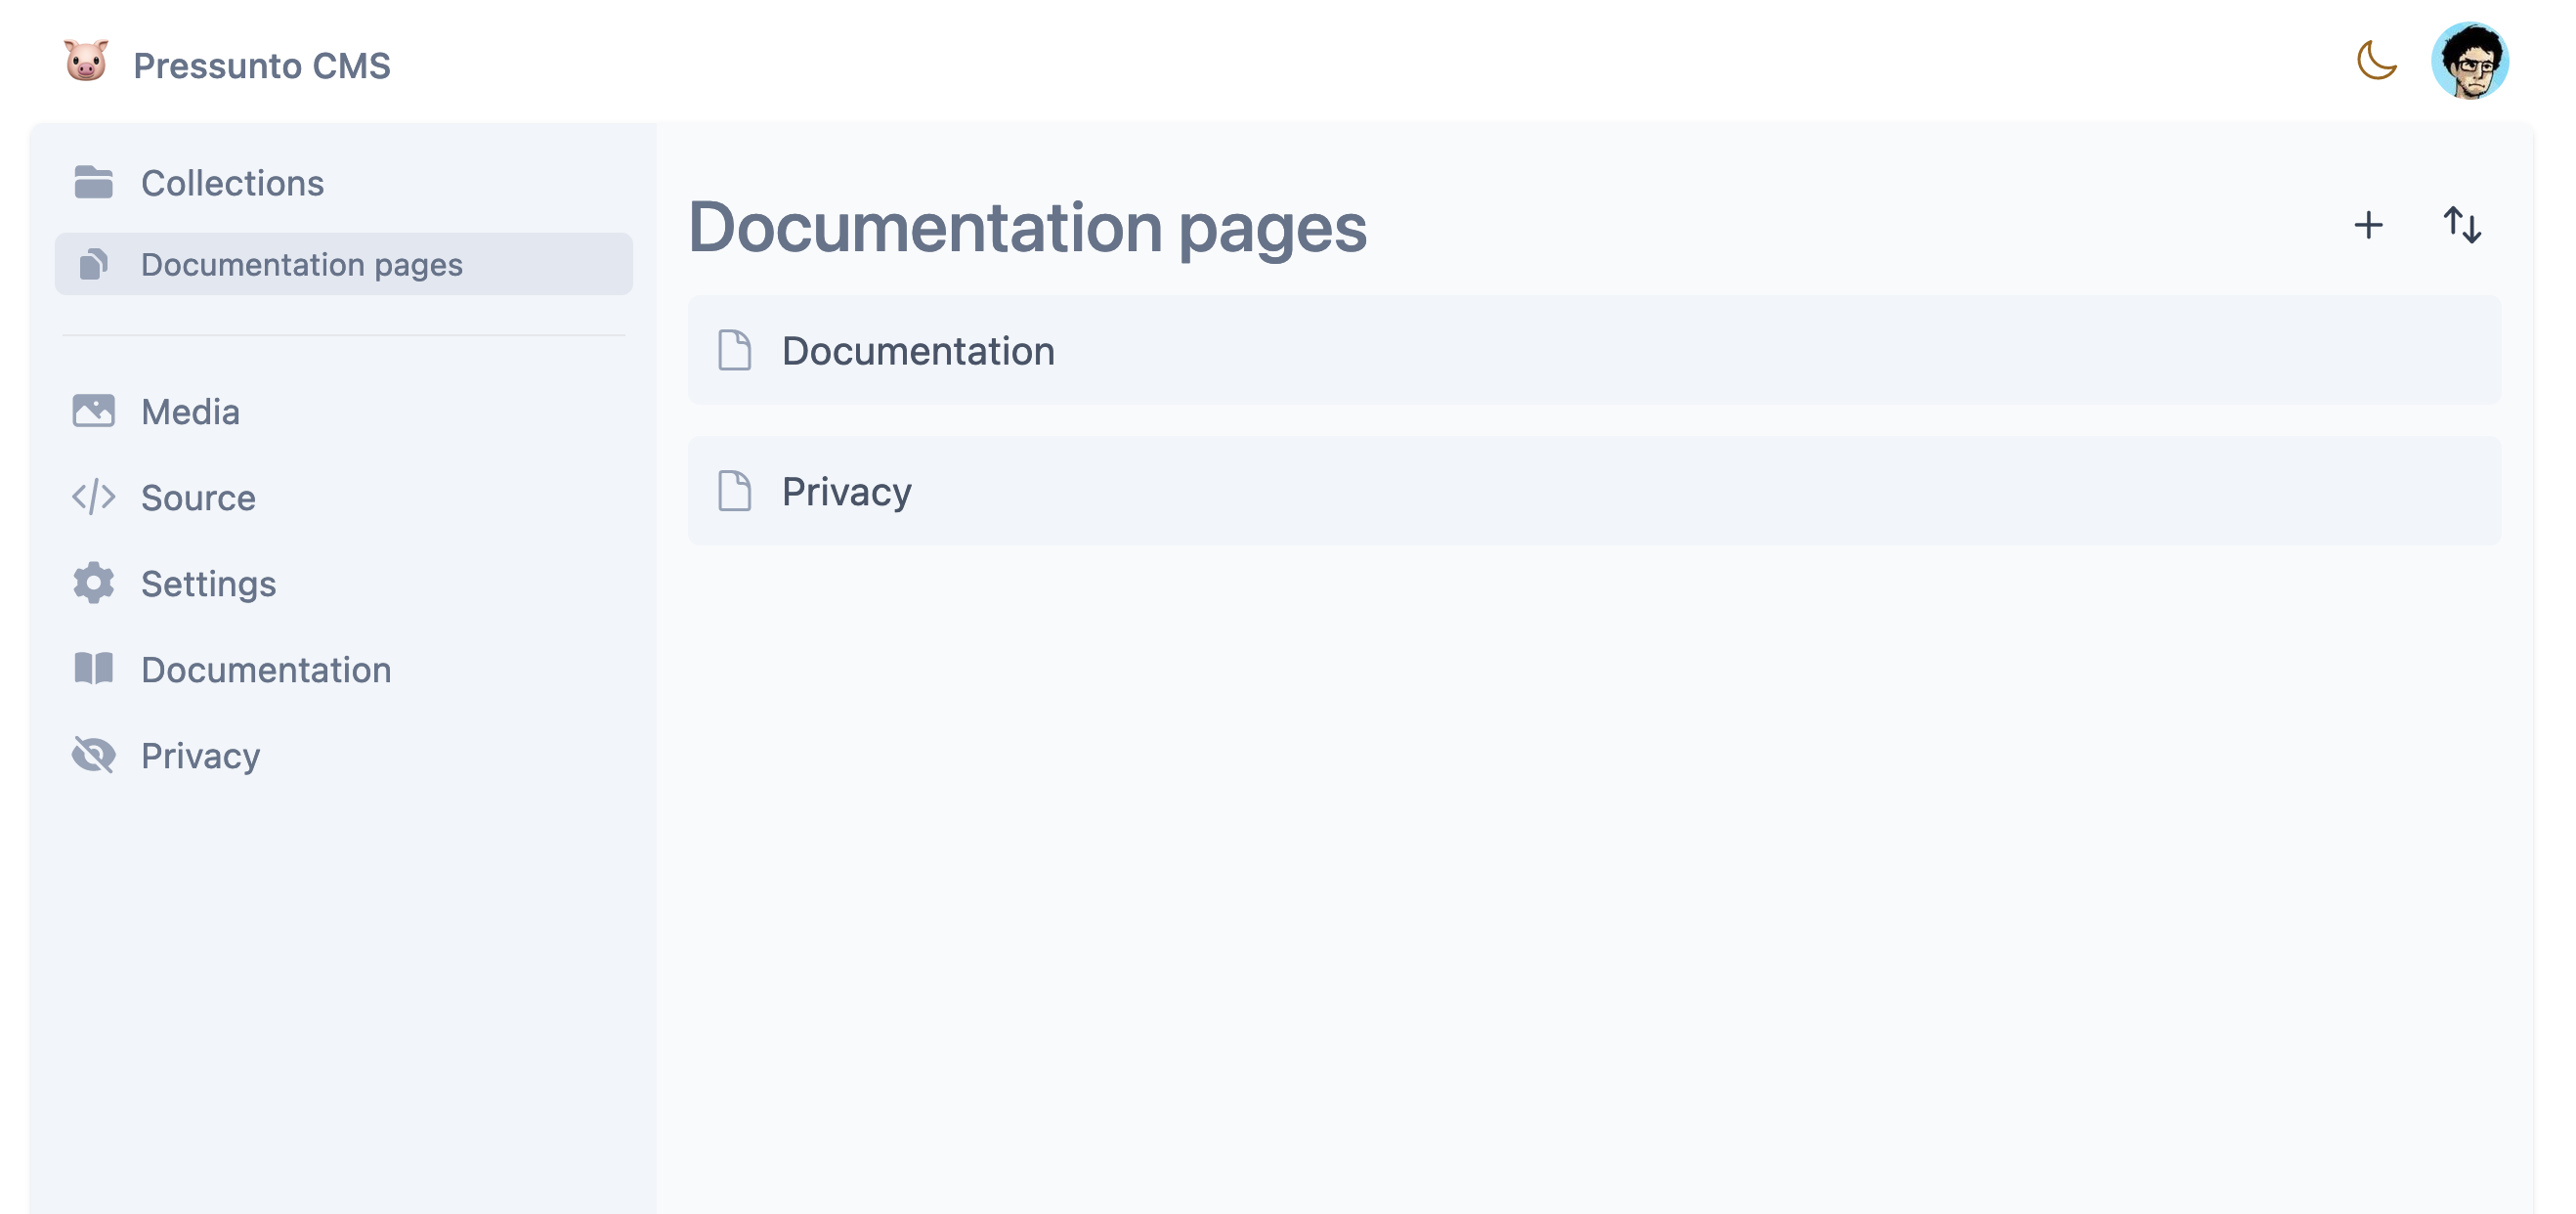
This screen lists all the posts in the collection by their saved title in the post frontmatter. From this page you can reorder your posts, access the post detail page for each post or create a new one.
Post reorder
By clicking the icon in the top right corner with the two arrows, you can enter the reorder view. This view will allow you to reorder your collections file by writing an order attribute to the attributes of each markdown file. You can then later use this attribute in your website to sort the blog posts.
Post Detail
You can use this page to edit the content and frontmatter for your selected markdown posts.
Post detail actions

This sections contains the main elements for action within the post editor.
- The back button returns you the list of posts
- The title field allows to assign a title the
post. This title will be displayed in the list of posts and will be saved in the post frontmatter as the
titleattribute. Because of this, thetitleattribute will be not editable in the fields editor. - The publish button will upload your draft document to github, creating a new commit to your selected main branch and cleaning the draft for this file.
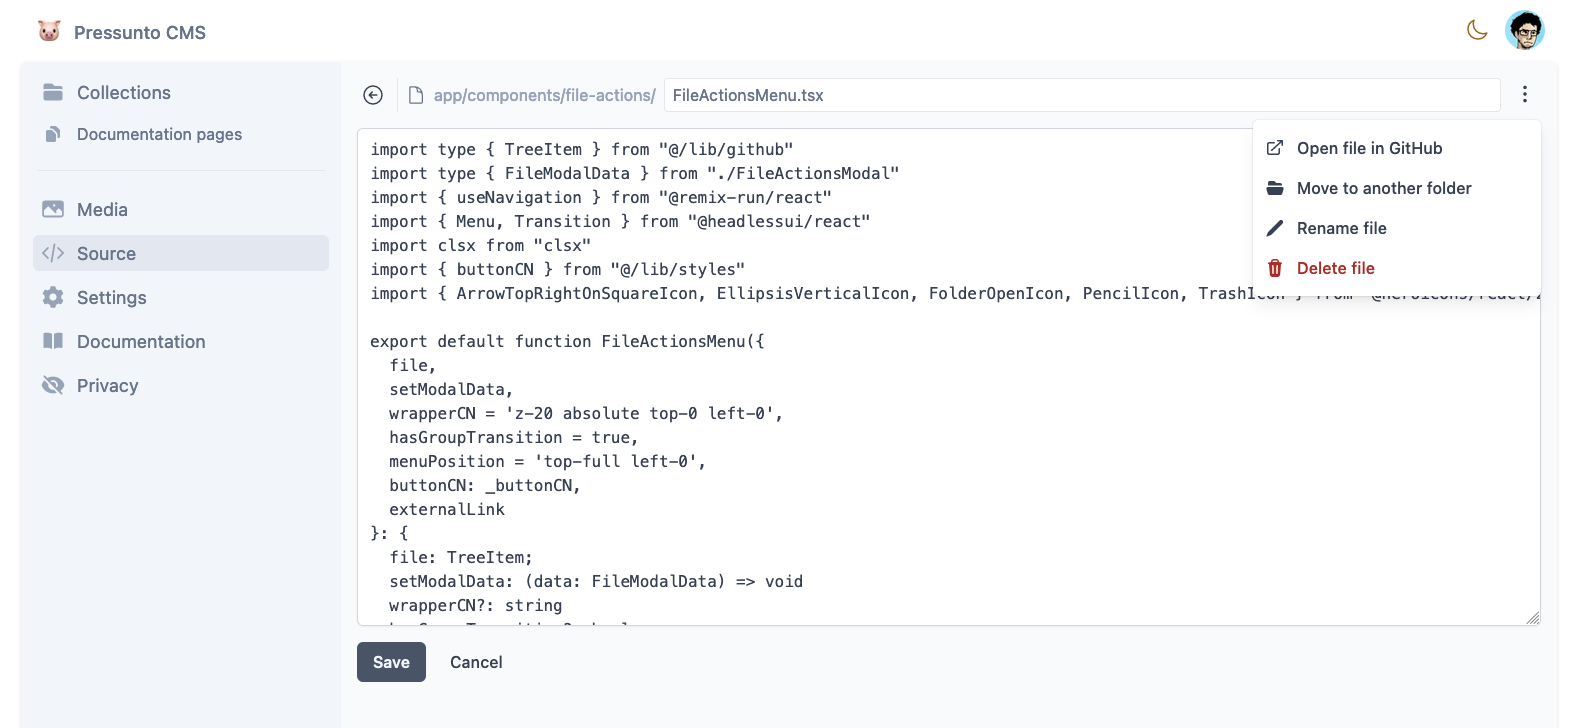
- The action menu will display a list of additional operations you can perform on this file. Most of them open a modal to confirm or complete the action.
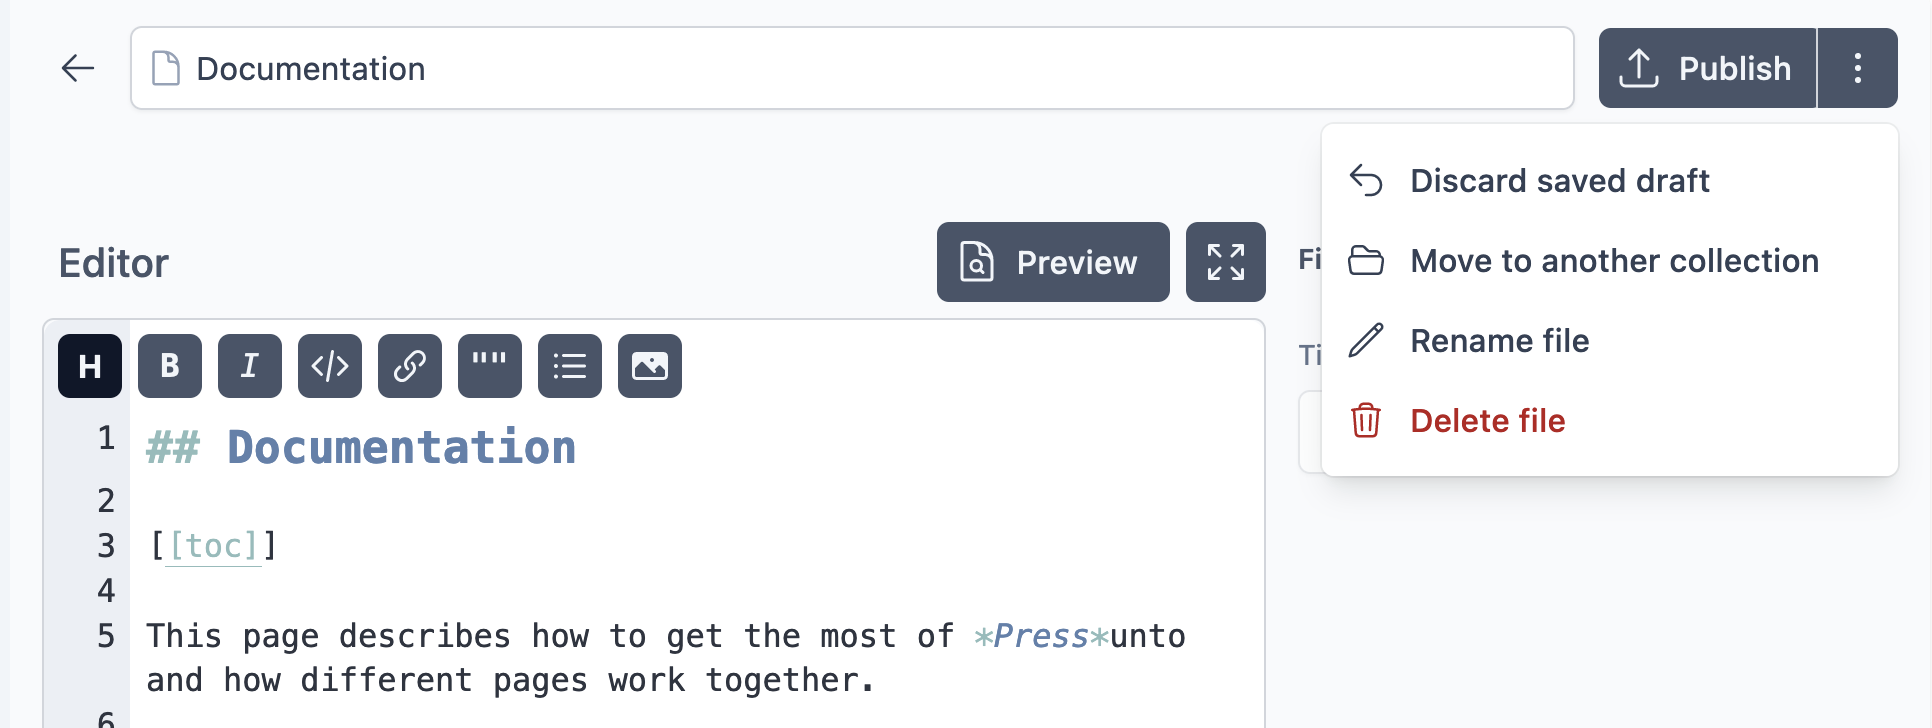
- Discard saved draft will clean your saved draft and completely return the post to the state it is on github.
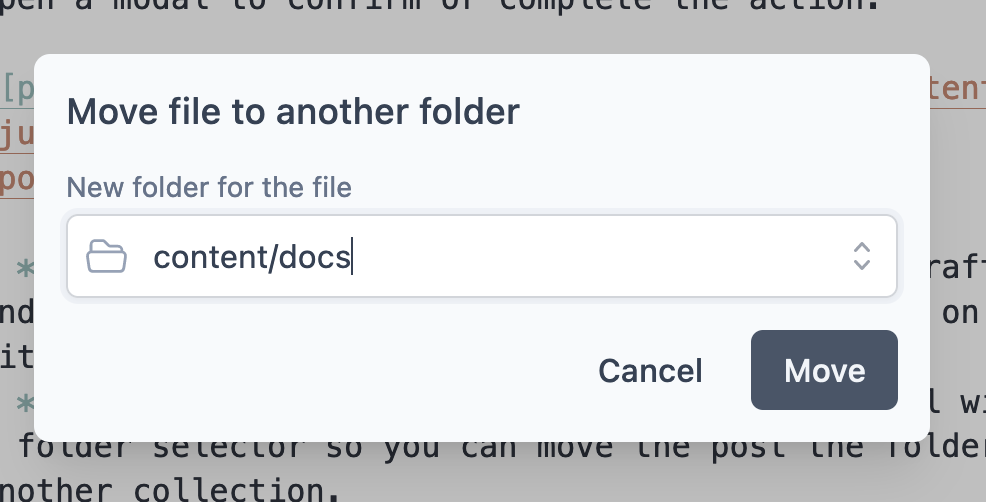
- Move to another collection will open a modal with a folder selector so you can move the post the folder of another collection.
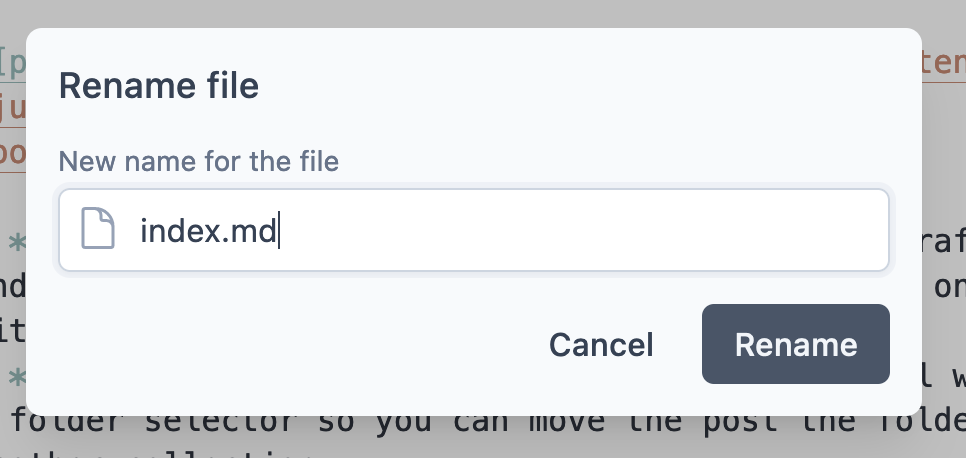
- Rename file will open a model with a text field so you can rename the file that backs up the post.
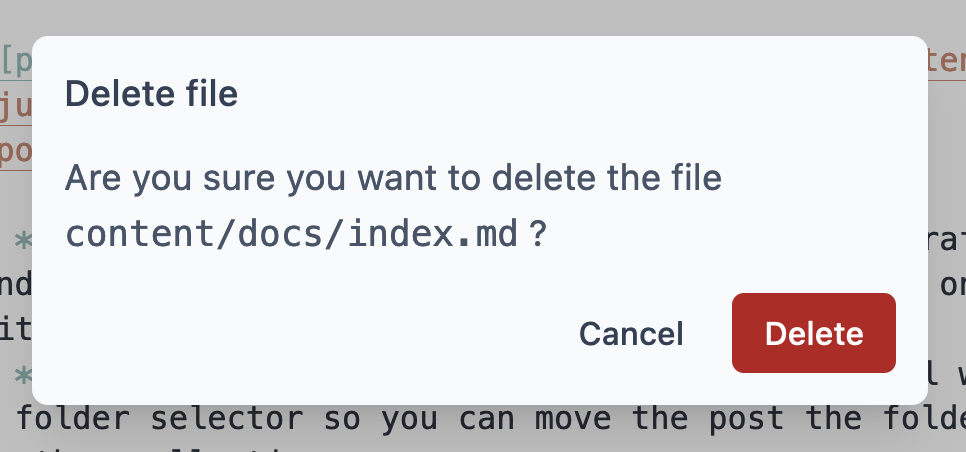
- Delete file will open a confirmation modal to make sure you want to delete the selected file.
Status Indicator
A small indicator revealing the current state of the document will be visible below the publish button and the button that opens the actions menu. This indicator will show an orange dot when you have written some changes to the actual document that are still not saved on github or in a draft. On the other case, this small dot would be green. It will also tell you when a new draft is being automatically saved.
Autosaving
When you are editing some text in the markdown editor, after you stop for a second, a new draft will be generated and saved automatically to the DB, so you can resume your edits later. You can also continue the editing from another device, as long as you are logged in with the same account.
Layout buttons
There are two buttons on top of the editor that modify the page layout: the Preview button and the Expand button (this one only as an icon).
-
The Preview button will render an HTML preview of the markdown text you are currently writing using a basic theme with emphasis on typography. Your changes to the text will not be lost when you click this button and you can always come back to the editor as you left it clicking the Back button on the left corner. This preview also supports emoji markup using the
:+1:syntax -
The Expand button will collapse the fields editor so you have more screen space for writing. Clicking this button again will restore the fields editor to its original state.
Accesibility consideration
The markdown editor supports rich editing of GitHub Flavored Markddown. This experience is based on the codemirror library. To offer a better experiencie in general, the editor will trap the Tab key when editing text inside, so pressing Tab will add indentation to the current line instead of navigating to the next input like the normal Tab navigation flow of the web browser will be. You can always get out of this state by pressing the Esc key. When you press the Esc key while inside the text editor, you can do the normal Tab navigation flow again.
Drag and Drop
The editor also supports image drag and drop. When you drop an image into the editor, a new commit will be created with the selected file. The editing will be blocked for a couple of seconds while the image is being uploaded to GitHub and a placeholder will be shown. When the upload is complete, the URL of the uploaded image will replace the placeholder. This process also applies to uploading an image by pressing the image button in the markdown editor toolbar.
Fields editor
The attributes in the frontmatter of the file will be listed as simple inputs to the right of the main markdown editor. The list of attributes will be populated with the fields defined in the collection template plus any other attribute the file may contain. You can freely add or delete any field from this list and it will be reflected on the post frontmatter.
Source Code
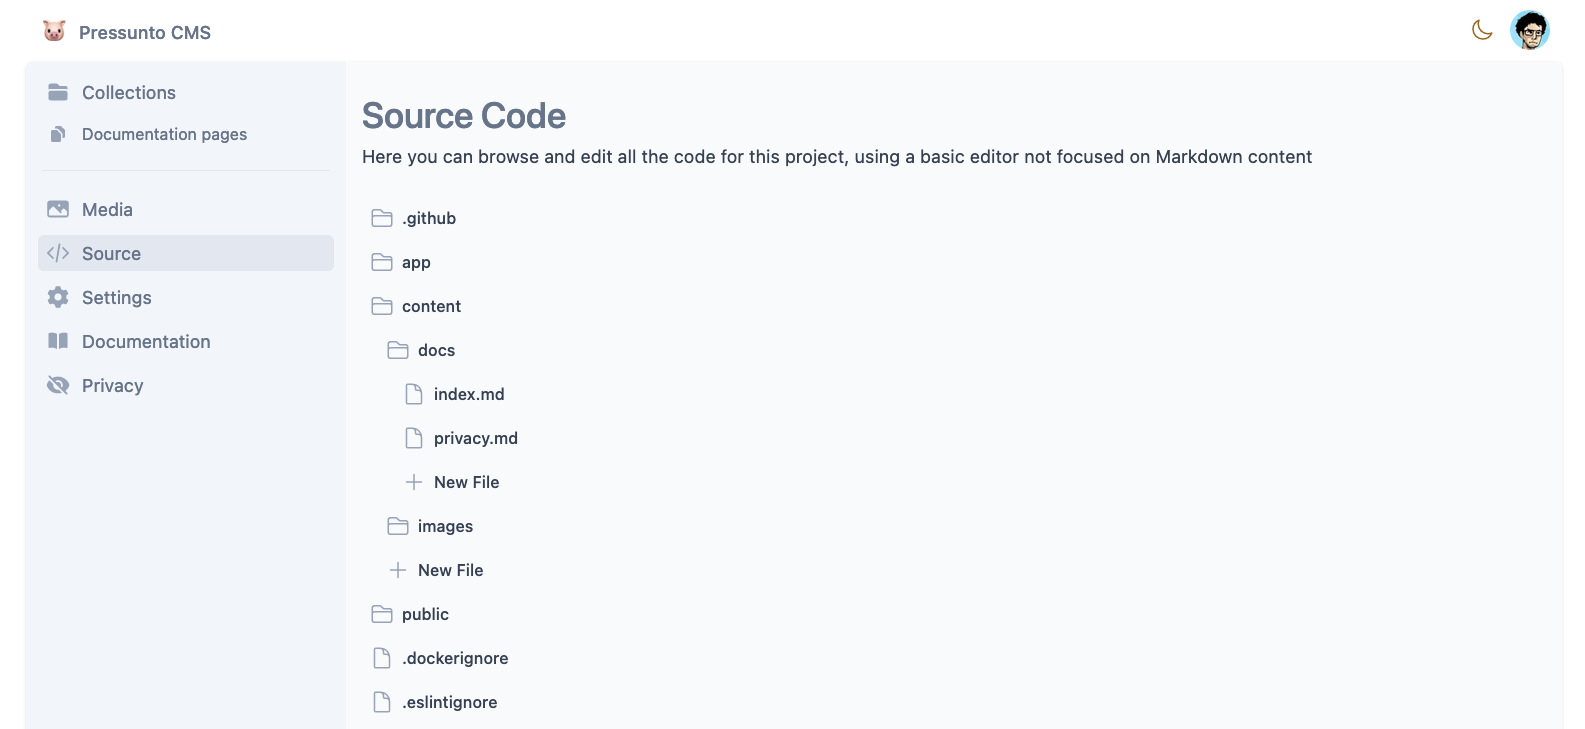
In this view you can browse all the files in your repo, so you can know which routes to configure in the collection sections. The files here can be edited plain, as they are in the github repo. This lets you tweak little details in the code of your application not related to the content you are tracking in your collection. From here you can also perform other file actions like move, rename or delete.
Settings

Here you can edit the configuration for your project, how content is organized and what defaults field are added to every content collection
Collection settings
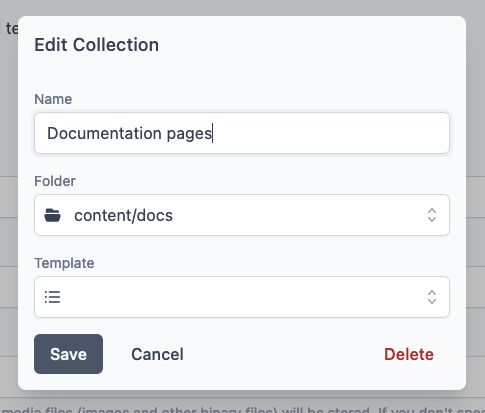
This section contains a little description of the concept of collections. Clicking the list items will open a modal with the information of the collection. Clicking the "new +" button will open the same modal for creating a new collection. There you can name your collection, select a folder from your repository and select a template from the available templates.
Template settings
This section contains a little description of the concept of templates. Clicking the list items will open a modal with the information of the templates. Clicking the "new +" button will open the same modal for creating a new template. There you can name your template, and configure the fields that will be added when this template is used. Like the collection detail screen, this modal also a list reorder feature that you can activate to sort the template fields to your liking. When saved to the config file, templates have the following stucture:
{
  "id": "blog",
  "name": "Blog",
  "fields": [
    {
      "name": "Tag",
      "field": "tag",
      "hidden": false,
      "default": ""
    },
    {
      "name": "Date",
      "field": "date",
      "hidden": false,
      "default": ""
    }
  ]
}
- The id field is created automatically as a slug created from the
namefield. - The name field is the label that is displayed in the templates list.
- For every element in the fields array:
- The field property is what identifies this element, the key that will added to the yaml frontmatter
- The name property correspond to the label input in the modal and is the label that will be shown in the markdown post editor
- The hidden property marks whether or not this field is displayed in the markdown post editor
- The default property holds the default value that will be asigned to this field when a post is created
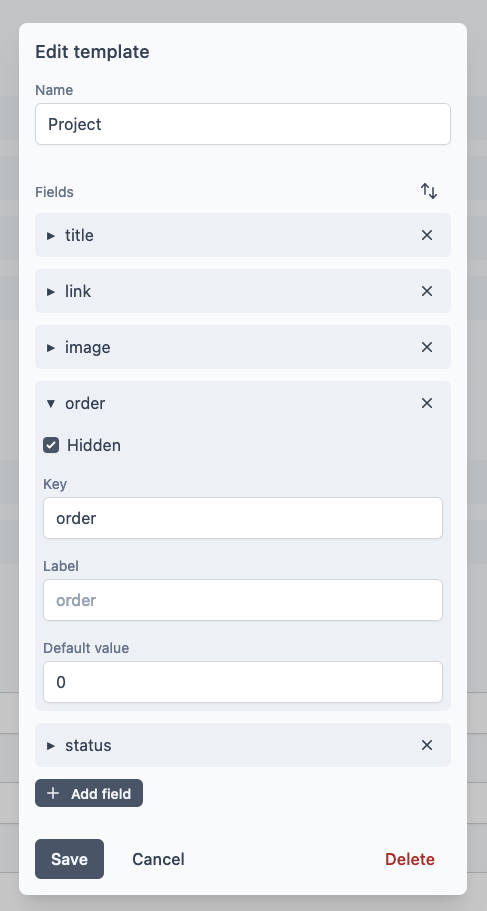
- The key field is the key used to save the field in the frontmatter, correspond to the id field in the json
- The label field corresponde to the name field in the json
Project settings
In this section you can edit your project title, and change the branch of the repository that your project is using. In this section you can also edit your media folder, the folder in your repository where images will be uploaded when using the post editor or the media page. If you don't specify a folder, all media files will be stored in the root of your repository.
Danger Zone
This is the section where you can delete your project and all related information to it. You can also mark to delete the configuration file stored in your repository, so editing in this platform leaves no trace in your repository.